I have had my Milwaukee String Trimmer for over a year now and it’s my favorite purchase I did for my yard, it makes handling the trimming and taming of my garden incredibly easy and swift.
Along that time I have dealt with some problems with it that I had to troubleshoot and find out the fixes for myself. Sometimes the line feed doesn’t work and the other times the trimmer just doesn’t start at all.
Before you go on reading this article, you may want to watch first the short video I made about this topic. You can watch the video below.
On the video, I demonstrated how you can fix 3 common problems you may encounter with your Milwaukee String Trimmer like bump feed not working, trigger not working, or a motor error.
How to Troubleshoot 3 Milwaukee String Trimmer Common Problems
So I figured I’d share my experience and problems with the trimmer to hopefully help you troubleshoot.
1. Bump feed not working
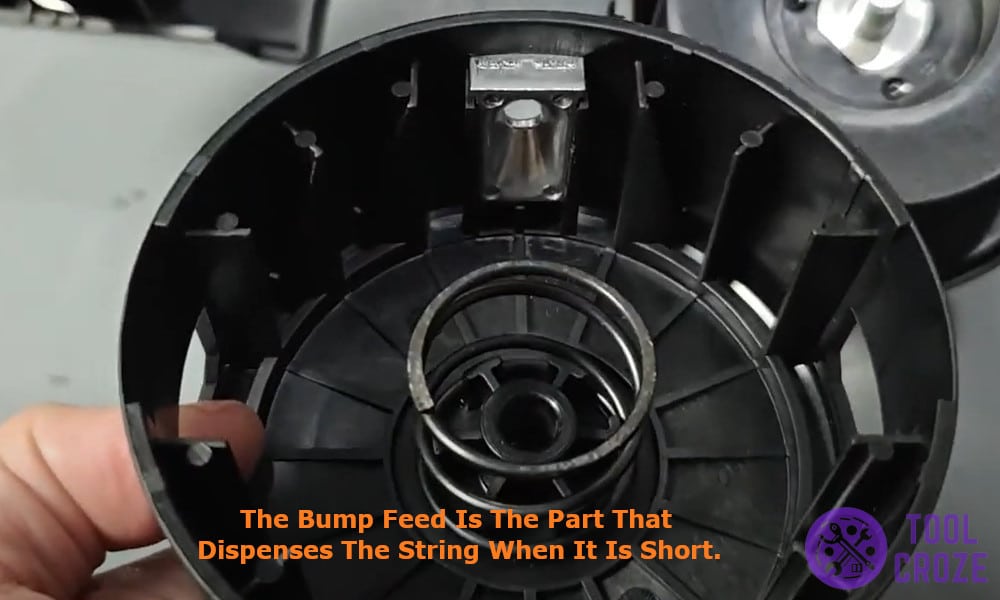
If you didn’t know, the bump feed is the part that dispenses the string when it is short, there are a few common reasons why it stops working.
One time the auto-feed stopped working on my trimmer, so here’s how I dealt with it. I started by removing the cap and pushed down on the spring and made sure that it wasn’t bent or damaged from anywhere.
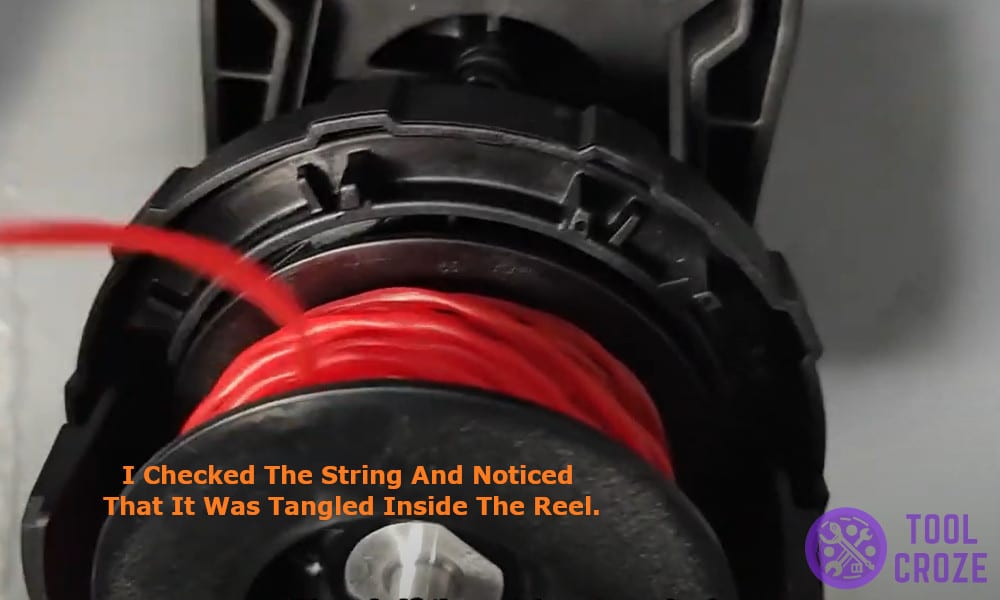
Then I checked the string and noticed that it was tangled inside the reel, so I unraveled the entire length completely.
Then I aligned the red mark on the cap and fed the string through the holes until both sides were even, before rotating the bottom cap anti-clockwise to reel it back in.
It took a bit of effort to reel the entire thing in but once done it worked smoothly.
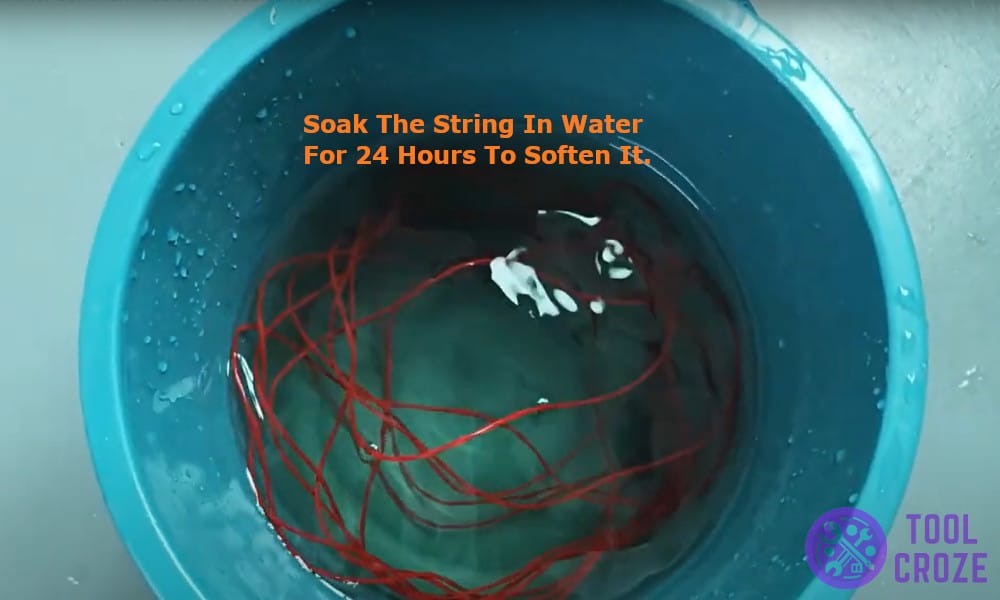
There is another common problem I have noticed, that is the string being too stiff, the trimmer strings dry out and become brittle over time. To fix that, you just soak the string in water for 24 hours to soften it and you’re good to go.
One mistake that I usually make is having the string cut in the wrong size which leads to uneven trimming.
But don’t worry I have a simple rule of thumb for that, check for the correct size of cutting string, mine was 2.4mm, and feed the right size.
Also, use the correct bump feed technique, rather than bumping the cap once and lifting the trimmer, you need to bump it to the floor and firmly hold it in place till the line is cut to the correct length.
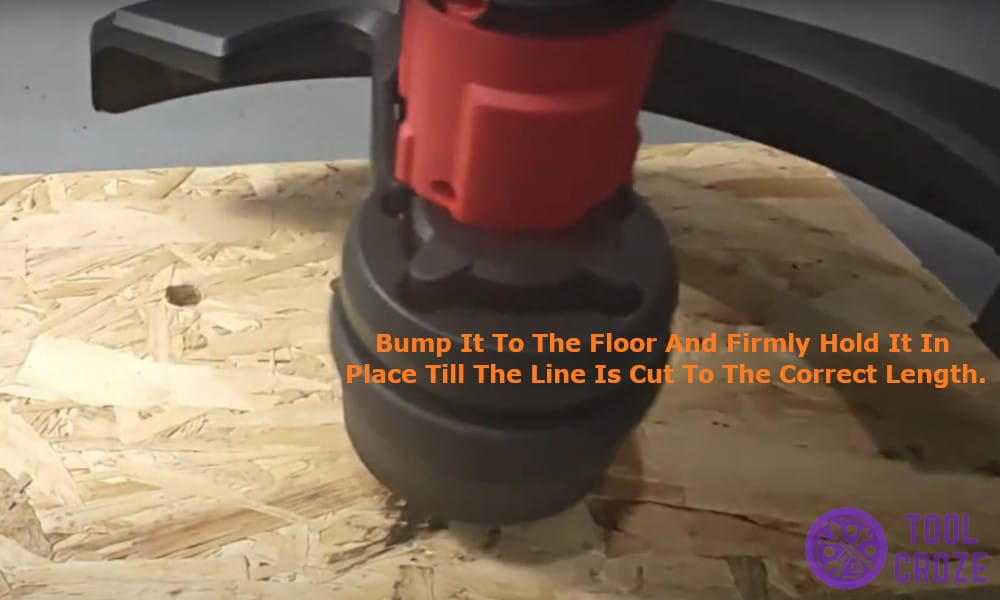
Just remember, the line should be of correct thickness, should be fed properly and the bump me technique should be right to cut the string.
2. Trigger not working
I remember facing this issue when one time I turned on the trimmer to work on my yard, pressed the trigger and nothing happened.
I know I had charged the battery a day before so it wasn’t that. Here’s how I did troubleshoot and fixing in that situation:
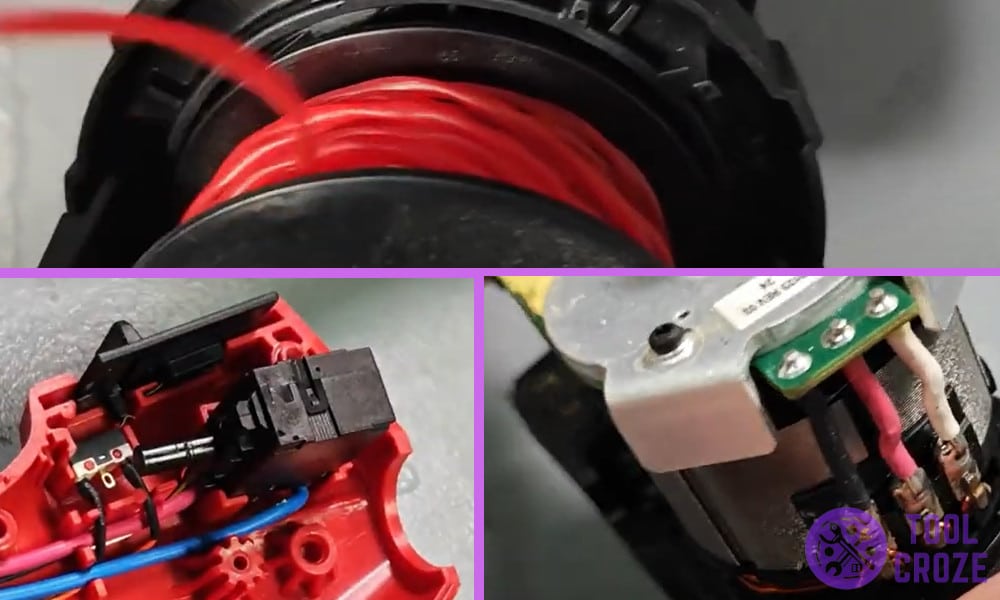
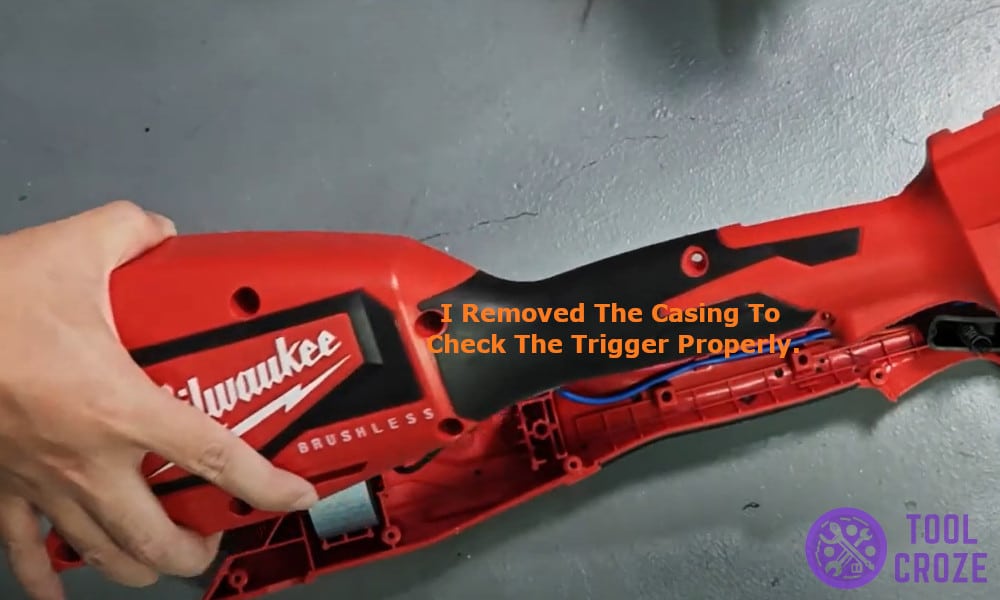
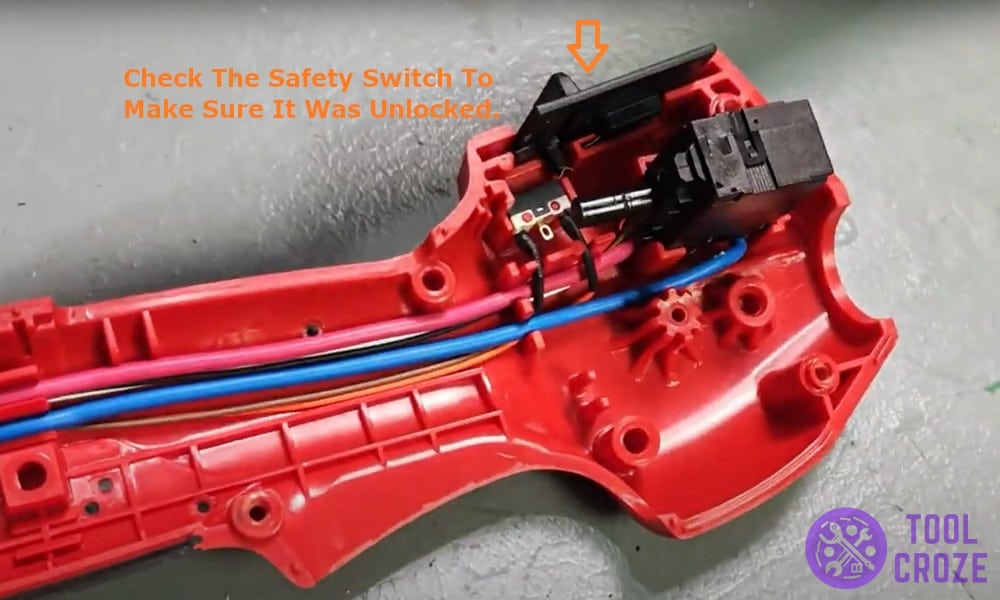
I started by unscrewing the screws on the casing and taking it off to check the trigger properly. Once the casing was off, I got to check the safety switch to make sure it was unlocked.
The Milwaukee trimmer has a safety lock button which is needed to be pressed before the trigger can be engaged.
Then I continued by checking the trigger manually, identifying if the trimmer felt loose or felt normal while clicking it.
This still didn’t help me conclude the problem as everything seemed fine so I decided to call the final boss, the multimeter.
In an electronic trimmer, the voltage when the trigger is not pressed should be somewhere between 14-18V and when it is pressed it should be 0, that is what my trimmer displayed.
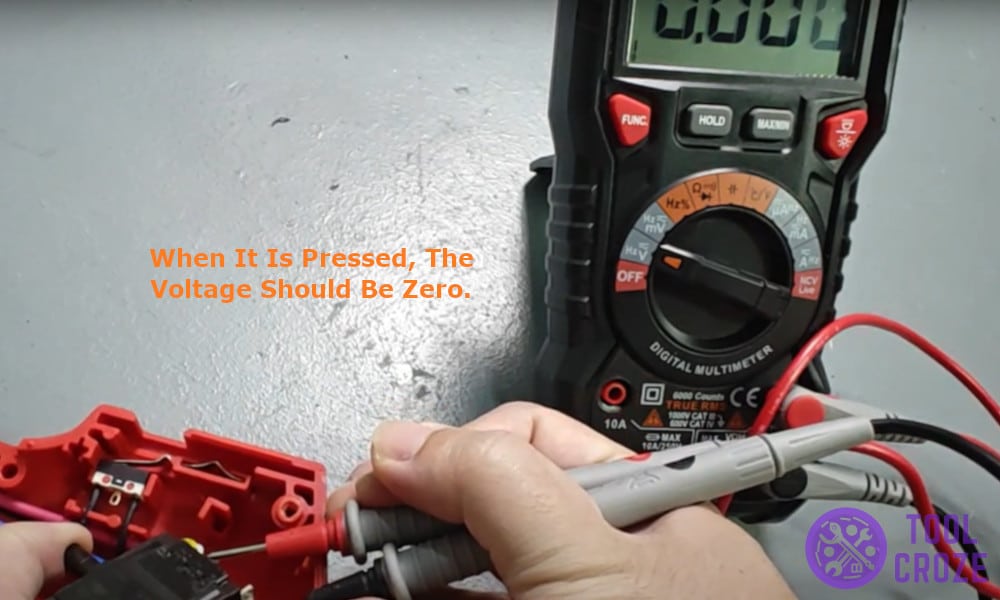
If you don’t get any reading when the trigger is pressed replace the trigger to fix the problem and make your trimmer work like new again.
I also made a short video about this topic which you can watch below. On the video, I demonstrated the solutions I discussed above.
3. Motor Error
The motor can go bad especially if you own your Milwaukee trimmer for a very long time and if you think your motor is at fault, this is how I check up on mine:
I start by turning the motor housing off, it is held together by a few screws. You can easily remove the housing using a screw driver and access the electric motor, just make sure the battery is disconnected.
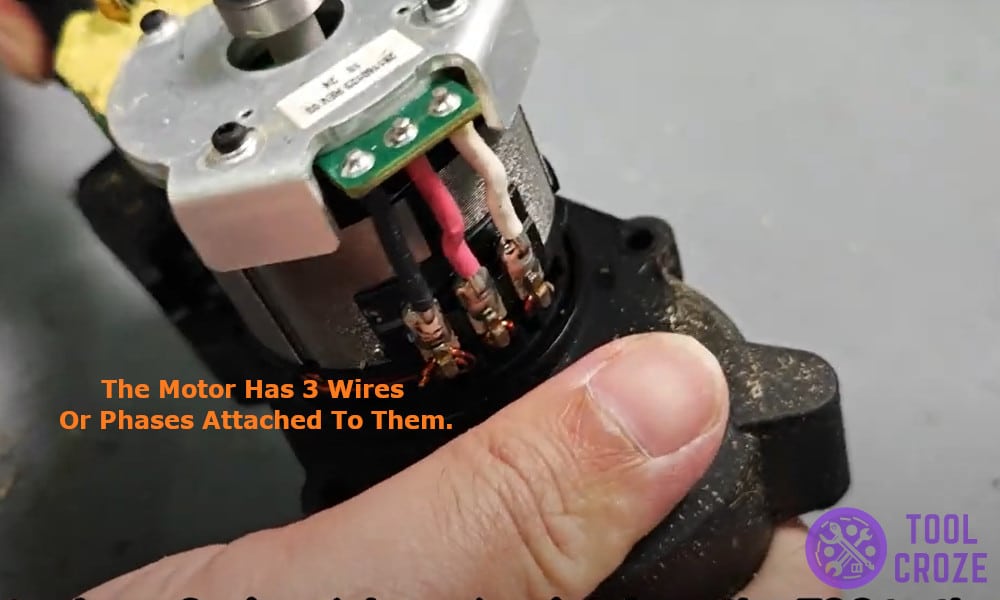
From there, it is pretty easy to inspect it, the motor has 3 wires or phases attached to them, going from the ESC (Electronic Speed Controller) to the motor it controls the speed of the trimmer and it is an essential component of the trimmer.
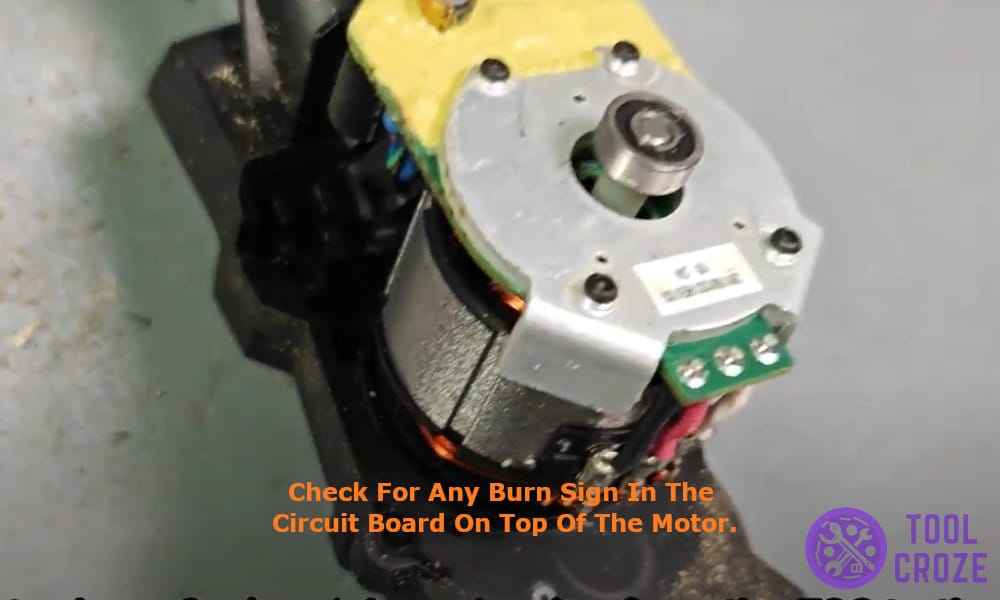
A short circuit in these can cause the motor to stop working, so I check for any burn sign in the circuit board on top of the motor.
Carefully look for any signs of water damage or burn marks. If you find a burnt wire or shorted PCB, it might be time to replace it. Check the label on the back for the model details to order a replacement and that should fix the issue.
