
So how do you replenish your Einhell 18V Power X-Change battery pack? It is simple once you get into the habit. Typicaly, you simply remove the battery from the tool and pop it out. There is no struggle. Then glance at the battery to see if it needs a charge or not.
A quick look at the LED indicator located on the side tells me how much juice remains, so I can make that determination as well. And it won’t be long until I have a fully charged battery ready for use again.
Understanding Charging Time Estimates
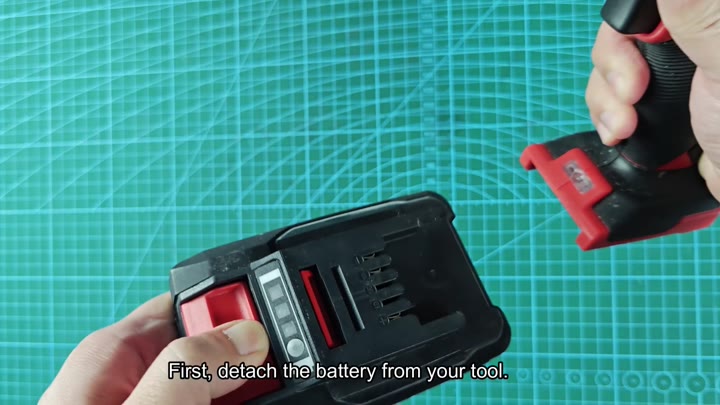
If the lights are low, you proceed to the charging station.
If the lights are low, you proceed to the charging station.
Next you’ll take the pack and slide it on one of its compatible Power X-Change chargers. Slide it in until it clicks into place. A simple mechanical click means your battery cells is tight against the charging circuit.
If it’s not connected properly, it won’t charge. And you can tell by feel because it doesn’t go in if it’s not clicked into place. Then the charger does the rest.
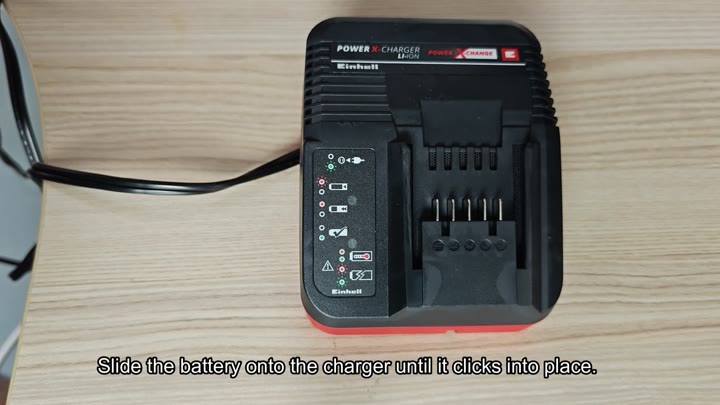
The visual feedback while charging is instantaneous. As long as the charger is plugged in and connected to power, the LED will be flashing red, which means it’s charging. That’s what you’re looking for on that light; if it’s flashing, then you know the system has kicked on and is functioning properly.
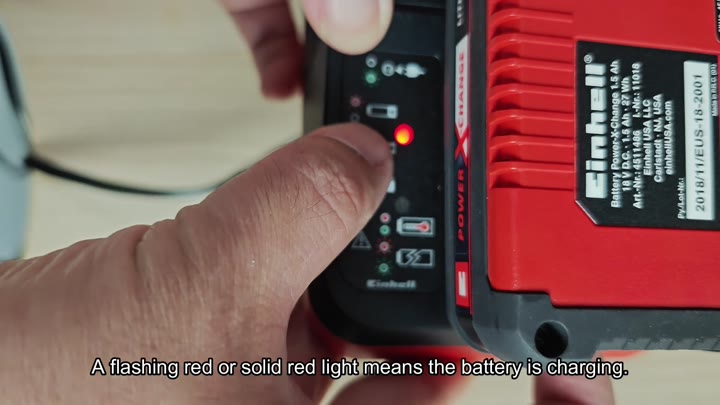
It might be a solid red as well, which would mean the same thing. Solid red mean current is going into your battery pack.
There is no ambiguity in these signals.
The signs are unmistakable.
Charging times based on cell capacity
The actual amount of time it will take to get your cells back up and charged will depend largely on how large the cell is. Expect around 30 minutes with a small 1.5 Ah cell on the rapid charger. That’s still pretty snappy if you’re swapping batteries out quickly on a job site.
On a 2.0 Ah battery, you can expect about 40 minutes of run time. It will take an hour to completely recharge a 3.0 Ah cell.
From there it gets even longer with larger capacities. A 4.0 Ah battery will take somewhere around 80 minutes. If you’ve got a big ol’ 5.2 Ah battery you’re looking at something like 130 minutes.
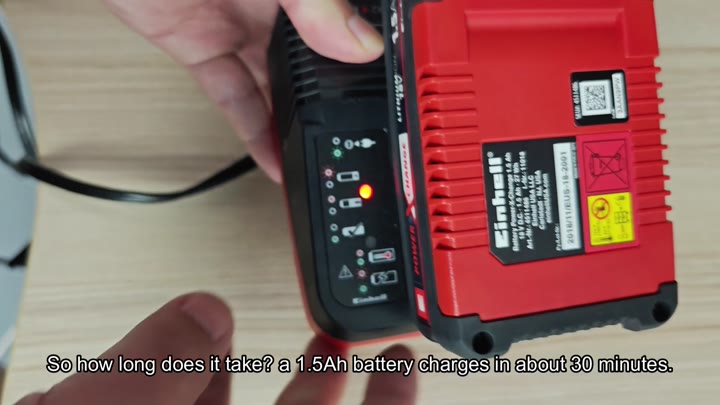
So this will help you plan how to work
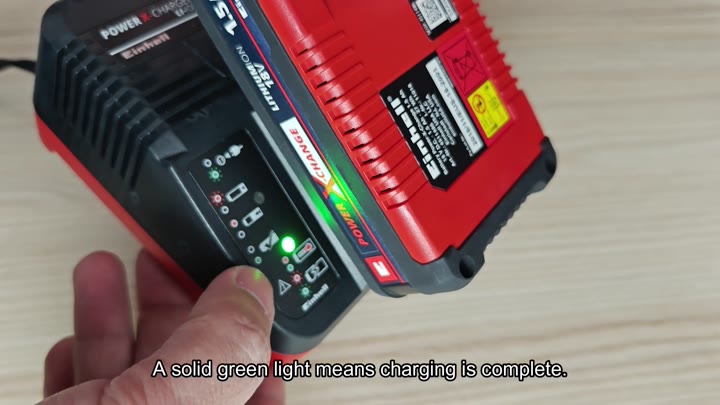
How long? When? Knowing the latter is equally critical as knowing the former. Fully charged is indicated by a solid green light that remains on. Green, there’s no uncertainty about it.
The battery is fully charged, with the chemicals reacting completely inside. It is now prepared for service. No sense leaving it plugged any longer. Leave it no longer than necessary. There’s nothing to be gained from overcharge. Remove the unit when the light turns solid green.
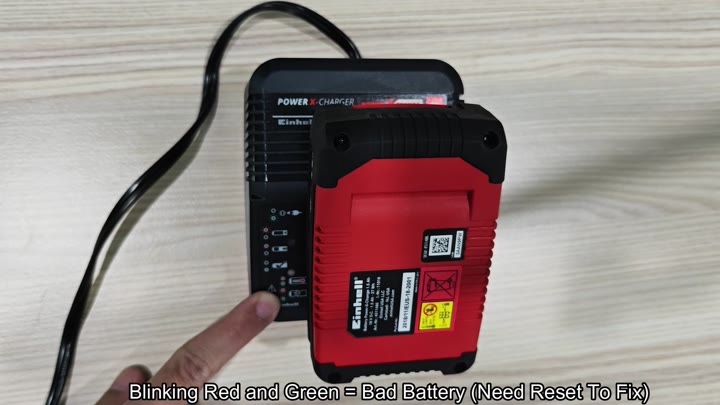
If you see the lights blinking both red and green at the same time, it means the battery is in a bad state and needs a reset.
But those signs don’t always work out like that. Sometimes, you’ll run into something where both of the lights flash both red and green at the same time. That’s a sign of a bad battery status.
Don’t take this to mean the hardware is irreparably damaged. Rather it tends to indicate a need for resetting the battery management system in order to fix the problem. The charge light error code is different than other charging indicator lights.

Knowing that can save you from blaming the charger for a bad experience.
But knowing the light codes eliminates wasted frustration. No more wondering if it’s on or off. Red flash = charging. Green solid = Stop. Blink mix = Reset.
It makes sense after a while when you learn to pay attention to the details. Every time you’re using them, you trust what they are telling you visually. It makes the whole thing predictable. There is no more guesswork and hoping for the best.
Just clear signals.
There is no ambiguity. The signals are clear.
But I am impressed by how consistent they’ve made the Power X-Change ecosystem. Batteries from one tool fit into any other. Chargers accommodates various capacity levels at appropriate charging rates.
The big ones (5.2 Ah) take a long time; the little ones (1.5 Ah) charge up in no time. It’s a versatile solution to match your workload. There’s no need for several charger types. The one system will do it all.
So all in all we have been happy with these batteries. They put out enough power to charge reasonably fast. We like how easy it is to see the LED lights. It takes the guesswork out of it. Whether you have a big saw or small drill, it charges consistently. Plug it in, unplug it, wait for the green light. When they don’t work right it’s also easy to troubleshoot. Reset and go.
You should of take the charging time in the manual seriously. It was tested and is correct. Don’t force it. There is no hurry. There’s no faster way.
Charging manages the rate of current coming into the battery to protect its life. You believe it. Because it works. And it makes the tools reliable. It is good enough for most jobs.
That’s what I like most about it. It’s simple. The design is simple. No fancy buttons, no digital screens to program. Clicks and lights.
There are fewer things to go wrong. Treat your batteries right, they’ll last longer. Charge them right, they will too. Don’t tinker with settings. Leave it alone. Best to just charge it standard. Boom.
So in conclusion, it works, it’s easy, and it saves a ton of headaches later when you need that tool. Pull out the battery and drop it in. See if it’s ok. Push it on the charger. Watch for a red flash and then a solid green light. Check the clock, add up the amp hours, and let her go. Or if it’s blinking red and green, start over by resetting the battery. It is a simple routine to keep the tools charged and available. Practical but certainly nothing remotly resembling complicated.
