
We’ve all been there: you input some program settings into your lathe and stand back to look at your finished part wondering why it’s so rough. Most often it’s not the feed rate or spindle speed, most likely it’s your carbide insert’s nose radius. The little round curve at the end of your cutting tool determines both life of the tool and roughness of your machined surface.
For many operators this is an afterthought. They’ll reach under their bench and grab whatever insert is handy and hope for the best. This continues until they are holding a critical part that requires a certain level of structural integrity or finish.
Why Nose Radius Matters for Your Cut
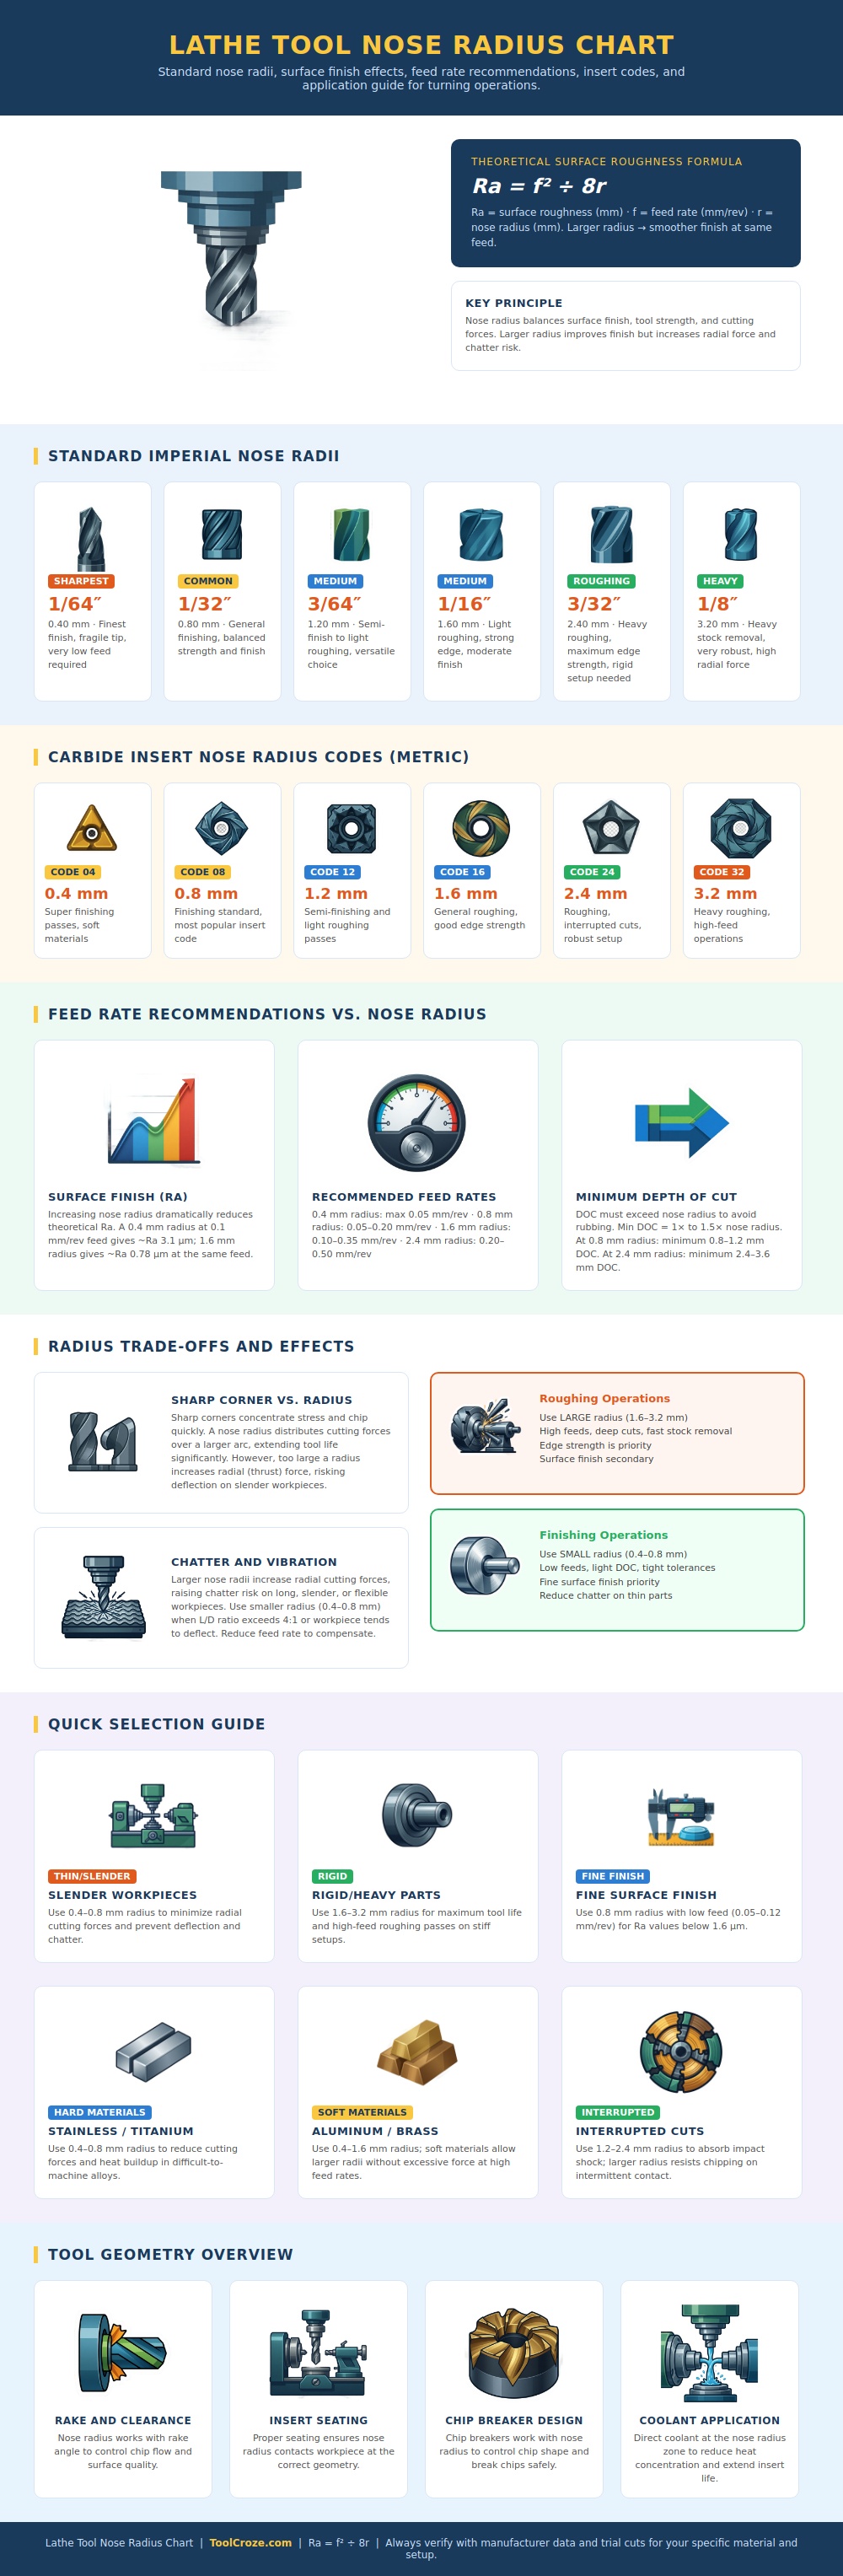
This comes back to the smooth/strength tradeoff. If we go back to our discussion of larger nose radii, bigger is better when it comes to smoothing out a surface. A wider radius covers more distance over the peaks left behind during prior passes. As the chart above shows, the Ra (roughness) depend on both your feed rate and your radius. Double your radius and you’ll get an order-of-magnitude reduction in Ra while maintaining the same feed rate. Again, it’s simple geometry but has huge implications based off a shop floor.
But don’t be tempted to go wild and give everything a giant radius; physics will push back. A larger radius also means higher radial cutting forces… Think of this as pushing harder on the side of workpiece and the tool itself. Unless your set-up is rock solid, that additional force result in chatter and deflection; not what you’re going for when aiming to improve your finish!
The correct insert code selection can be put simply by reading the packaging’s label. On carbide inserts you’ll see numbers like 04, 08 or even 16 stamped into them. 6 mm radius That’s a shorthand that saves you time when leafing through catalog pages. In case you’re operating in shops where they still think in inches, the infographic points out standard imperial equivalents.
For instance, a 1/32 inch radius is the workhorse of general finishing, providing a balance between good surface quality and edge strength. It is versatile enough for most things that come along day-to-day but it is not quite strong enough for heavy roughing or delicate enough for mirror finishes on soft aluminum.
Another variable that trips people up is depth of cut. To get the most effective use of entire cutting edge, you have to make your cut deeper than the nose radius. Rubbing along the edge, trying to finish it with a deep radius tool but just taking off a thousandth isn’t cutting. It’s rubbing. This causes heat and wears down insert rapidly. It also produces a bad, inconsistent surface that will be glazed over.
The general rule of thumb for how deep your minimum depth of cut needs to be is greater than your nose radius, and frequently times it’s fifty percent more. In other words, don’t expect to get great results making a shallow pass on something like a 1.6 mm radius tool when you were roughing with it. Give that powerful edge some meat to work with.
Your strategy will depend heavily on the material being machined as well. For example, smaller radii between 0.4 mm and 0.8 mm tend to be safer for machining stiffer materials like titanium and stainless steel. These produces less radial force, which lowers the risk of heat and vibration in those more challenging alloys. On the flip side, you’re able to get away with bigger radii while turning brass or aluminum because it’s easier to remove and softer then harder alloys. Match the material’s resistance to the tool’s strength.
Last but not least, look at your part’s geometry. Thin wimpy shafts flex in one direction. And if it’s long, it’ll do so when you put pressure on it. Big radius on these types of pieces? Chatter city, my friend. Polishing won’t clean up chatter marks, either. Keep the radial force down by going small with the radius on slender stuff.
If you’re working on some heavy blocky bits that need plenty of stock removed, bust out them big ol’ 3.2 or even 2.4 mm radii. These has greater toughness to take the brunt of your cutting force and they also last longer under load. Find that happy medium between rigidity of your setup and feed rate; make the biggest radius possible while maintaining control over both.
When you do, what was once a guessing game becomes a science. Your parts will exit as expected: on time and smoothly, without needing to buy new tools. The curve makes all the differance.
