
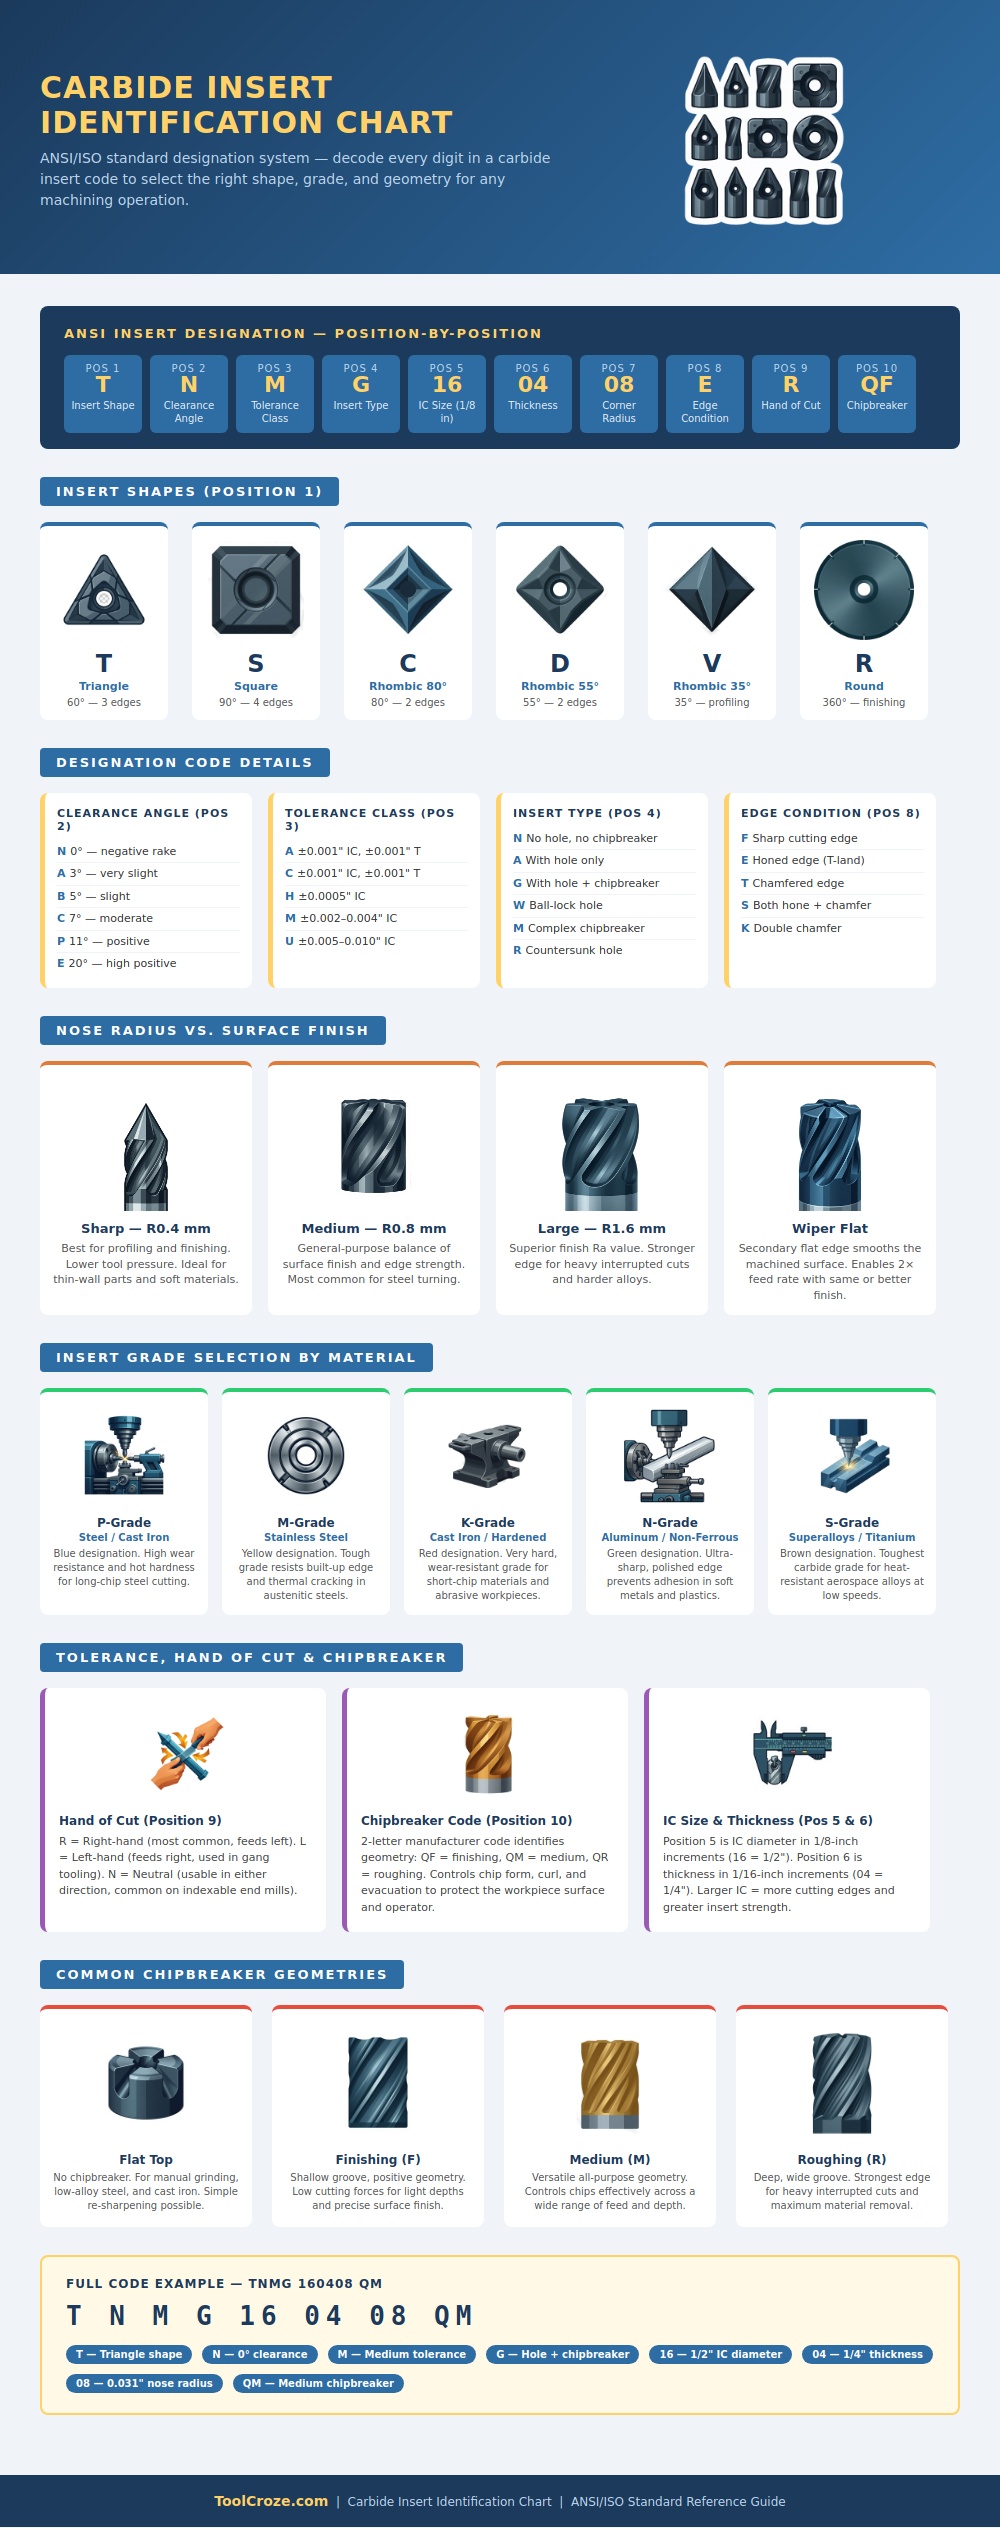
If you’ve ever stood in front of a box full of carbide inserts and scratched your head, join the club. It’s like they’re little jewels, except that using the wrong insert will wreck a tool holder or destroy some part. Each insert has a coded description of its specific characteristics, and although it’s uniform across the industry, most folks don’t interpret it propery. It’s nothing more than a number (and a letter) that represents a detailed set of instructions on how to remove metal.
First, consider the shape, the strength of the corner, and the number of edges. For instance, a square cut insert will give you four cutting edges and a more even distribution of heat, whereas a triangle cut insert will only give you three. However, they is all good at doing light roughing. The rigidity of your machine and how much material you need to take off would determined which one you use.
How to Read Carbide Insert Codes
Clearance angle: The second position defines the clearance angle, which determines whether the insert has a positive or negative rake geometry. More support behind the cutting edge makes the negative stronger. They also works well on heavy cuts in tough steels. Positive inserts will be sharper and take less horsepower, but they’re best used to finish soft metals like aluminum. If you overheat the spindle or break off the tip, you have made the wrong choice.
Number three is the tolerance class and something many start-up machinists don’t consider. This is important for precision parts held to close tolerances. Standard tolerance means there will be some variation. High-precision grade mean each insert fits exactly into the holder with no runout and no chatter.
Then comes diameter of inscribed circle and its thickness. This number shows size of the insert as well as amount of support it gets for vibration resistance. In general, a larger inscribed circle makes it stiffer, which reduces vibration and provides more cutting edges. But the bigger the inscribed circle, the bigger the tool holder should of be. So you need to get exactly what your machine can handle.
The nose radius is perhaps the most important thing to consider for surface finish. The smaller the radius, the sharper your point will be, which is good for fine detail work like profiling complex shapes or cutting thin walls where you want to reduce pressure. But a bigger radius makes a stronger corner and rounds off the surface of what’s being cut so there are fewer scallops left behind after each pass. It’s a strength/precision tradeoff and there’s no getting around it.
Last but not least, the shape of a chipbreaker governs what happens with the metal when it is curled off during a cut. When using a flat top insert, you get long stringy chips that are hard to control and potentially dangerous. The new-style chipbreakers cause the chip to break down into manageable small pieces that sweep clear from the work area without scratching the surface of workpiece or endangering the operator.
But knowing the code turns buying inserts into an engineering decision instead of a guessing game. It becomes about choosing the inserts best suited for job instead of thinking they are all the same. Learning how to read these codes fast is a learned skill, but once you get good at it, you have control of the machining process. You didn’t had that kind of control with trial and error.
The next time you grab an insert take a moment and read the code. This small habit sets a skilled machinist apart from everyone else who just hopes their machine doesn’t break.
