

Selecting the proper drill bit tips may seem like a relatively small detail in the preparation for a wood project. However, a person may find themself with a drill bit that wander across their workpiece or one that snaps in half during a challenging task. The bit of geometry located at the end of a drill bit perform the majority of the work that a drill bit perform.
The geometry of the tip of a drill bit will determine how cleanly the drill bit will cut into a workpiece and how much heat the drill bit will builds up during operation. Furthermore, the geometry will also impact whether the drill bit begins to pull itself into the workpiece or whether the person must apply continual downward pressure on the workpiece. Finally, the geometry will determine the lifespan of the drill bit before it becomes dull.
Only a few drill bit tip geometries is available for purchase by the average hobbyist. Each of these tip geometries are manufactured for specific types of materials and tasks. Once a person understands each of the function of these tip geometries, a person will no longer have to rely on the intuition that a person typically employs when shopping for hardware.
A person will instead feel confident in their selection of drill bits according to the tasks that they will perform with those drill bits. Twist bits, which feature a standard 118-degree point, are the most common drill bits that are included in inexpensive kit purchases. Twist bits are used to drill into a variety of materials, including wood, plastic, and mild steel.
These drill bits feature long spiraled flutes that will carry the metal chips out of the workpiece and a sharp point at the center of the drill bit that starts the cutting action. The 118-degree angle features a balance between the angle that is used for cutting into relatively soft materials and the angle that resist chipping when cutting into harder materials. These twist bits are included in inexpensive kit purchases for a reason.
They are versatile in the types of materials that they will drill into, they are inexpensive to purchase, and they are effective at performing the tasks that is placed upon them. The main drawback to the use of twist bits is that they will wander if they are used on relatively smooth materials unless a center punch is used at the location where the drill bit is to be started. However, twist bits are the most common drill bit seen in a workshop.
Common Types of Drill Bit Tips
1. Split-point Twist Bits
Split-point twist bits are similar to basic twist bits but feature a split at the tip. This split at the tip allow the split-point twist bit to reduce wandering of the drill bit and to reduce the thrust that must be applied to drill into a workpiece by approximately thirty percent. Split-point twist bits are useful for those who have struggled with bits like 1/4-inch twist bits that work best when the workpiece is supported from one side only.
The main downside to split-point twist bits is that once the split at the tip wears with use, they will no longer provide the benefit that a split-point twist bit offers. Thus, they are more expensive but will need to be replaced more often than standard twist bits. Brad-point bits are similar to twist bits but feature a sharp spur at the center of the drill bit.
This sharp spur help to position the brad-point bit relative to the workpiece and prevents it from wandering. The flat edges on the sides of the brad-point bit allow it to shear the wood fibers to create a clean hole. Woodworkers use brad-point bits because the holes are perfectly round with crisp edges.
The downside of brad-point bits is that because they do not feature the long spiraled flutes of twist bits, more effort must be made to back the brad-point bit out of deep workpieces. Still, the precision of the brad-point bit makes this downside relatively small. Masonry bits has a blunt tip made of carbide material.
2. Masonry Bits
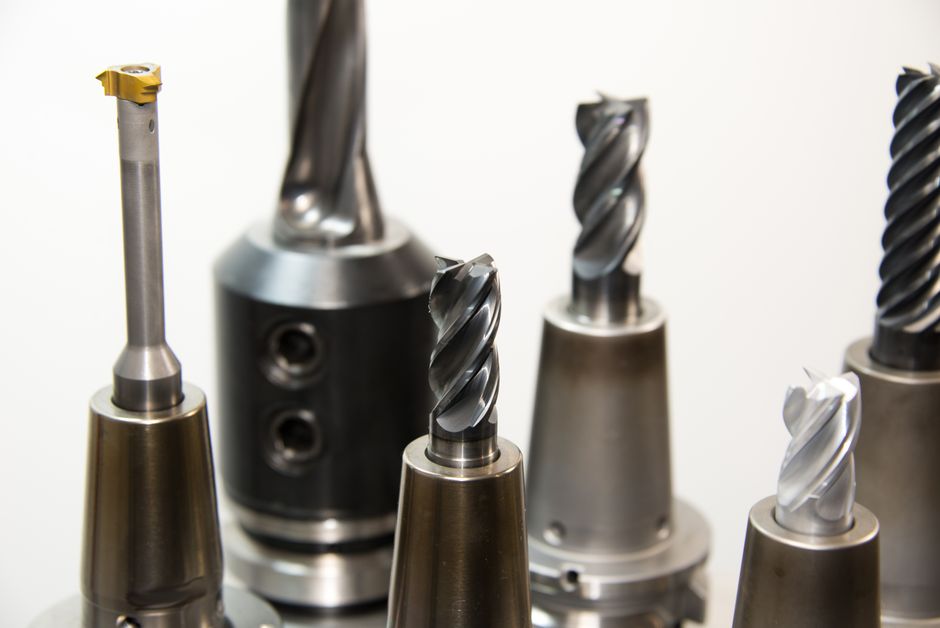
This blunt tip is specifically not for cutting into masonry but for the pounding action of rotary hammers or hammer drills that displace the masonry material. Because of the blunt edge, these drill bits will not snap when encountering concrete, brick, or stone materials. However, they will not provide any benefit if used in a standard drill bit because they will heat up and glaze over when forced to continuously cut into a material.
A person should have a set of masonry bits dedicated to cutting into concrete and brick but should never lend them to another workshop member who intends to use the bits for sheet metal. Forstner bits are used for cutting clean holes into wood. Forstner bits do not feature a point but rather a series of cutting edges around the perimeter of the bit and cutting edges that shave the bottom of the bit.
The result of the use of Forstner bits will be a hole that features a flat bottom and smooth sides to the workpiece. Cabinet makers use Forstner bits to drill holes for hinges and other hardware that require a flat bottom. Because Forstner bits do not feature a point that allows a drill bit to be started freehand, these bits must be set into a drill press or jig.
Forstner bits will generate more heat than twist bits and must be rotated at a slower speed than twist bits but create a finish to the workpiece that is worth the extra time to use these bits. Spade bits are flat bits that feature two cutting wings. These bits are best used for making deep holes into wood that is used in framing.
3. Spade Bits
The long and skinny shank of a spade bit allow it to penetrate deep into 2x4s and 2x6s without getting stuck. The leading point of the bit keeps the bit centered in the workpiece. The cutting edges of a spade bit will produce a relatively rough hole as compared to brad-point bits.
However, for tasks like installing electrical wiring, plumbing, or to save time in general, a spade bit will be of more benefit to a person than a brad-point bit. Furthermore, spade bits are relatively easy to sharpen with a file. A person must be careful to avoid increasing the stress on the bit to the point where it will begin to slip on the workpiece.
Instead, the workpiece may begin to splinter at the exit wound of the drill bit. Step bits, also known as unibits, feature a series of steps of varying diameters on a single bit. These bits are used for cutting a range of sizes of holes into thin metal sheets, plastic, and fiberglass without having to change bits.
The best way to use step bits is to let them perform their function at a low speed. Step bits will skate or overheat if they are forced to drill into a workpiece at a higher rate. Because each step features a shallow cut into the workpiece, they will stay cool while drilling.
However, these bits will not cut into thick materials; if the thickness of the workpiece is more than the height of the tallest step on the unibit, it is better to use a twist bit or a hole saw. Auger bits are twist bits that feature a coarse lead screw at the tip of the bit. These bits are used for boring deep holes into wood.
4. Auger Bits
The lead screw will pull the bit into the workpiece, and the large and deep flutes of the bit will fling the shavings of wood out of the workpiece. Carpenters use auger bits to drill through heavy timbers with long bolts or to drill holes for dowels. The effectiveness of the auger bit ends when it encounters a knot in the wood or when it becomes caught on the other side of the workpiece.
A person should have a good grip on the auger bit while it is drilling but be ready to release the trigger of their drill bit to remove the auger bit from the workpiece. Carbide-tipped bits for tile and glass have a spear-shaped tip made of tungsten carbide material brazed onto a steel shank. These bits are effective because of the angle at which they are ground and the material of the tip.
5. Carbide-tipped Bits
The ground angle and carbide tip allow these bits to grind the material rather than cutting through it. This is essential because brittle materials like ceramic tiles or glass will shatter if cut with a standard twist bit. Carbide-tipped bits for tile and glass must be run with water at a low speed without any hammer action.
The spear tip prevents the bit from wandering on the tile or glass while drilling. Although relatively durable, carbide-tipped bits are consumables. Eventually, the carbide tip of these bits will chip.
However, while they last, they will allow a person to cut a neat hole in a ceramic tile rather than a crack in the tile. The last type of drill bit tip that a person should have in their workshop is a self-centering bit. A self-centering bit has a twist bit that is contained within a guide sleeve.
The guide sleeve will drop into the workpiece and be positioned so that the twist bit is automatically centered within the workpiece. A self-centering bit has a relatively narrow use but may prove beneficial to a person who often has to drill into hinges. A self-centering bit will make it possible for a person to easily hang a heavy door on a door frame without having to find the exact spot where the screw should be driven.
A self-centering bit may seem unnecessary but will come in handy to a person who has struggled to get a heavy door to stay steady while they are balancing on a ladder. No degree in engineering or machining is required for a person to master the different tip geometries of drill bits. A person does not have to understand the detailed function of each of these bit tip designs.
All that is required is for a person to pay attention to the type of work that they are performing and the material that is being drilled. Mastering the different tip geometries will result in a person feeling as if they are working alongside their drill bit rather than fighting against it. Each of the small cones, spur, carbide edges, and points at the tip of the bit will come to be associated with the reason that a project will turn out so well.
When a person selects the appropriate bit, they will find that the rest of the job becomes much easier.
