I was midway through a concrete drilling job when my Hilti power tool suddenly gave up on me. I popped the battery out, and plugged it in charge right away, to my surprise the Hilti battery charger showed me a solid red light.
No charging, no blinking nothing, I knew something was off and when I tried looking it up in the manual I got to know it was a dead battery indicator light.
I couldn’t let a dead battery halt my day and stop my drilling job so I hopped on the internet to find some solutions and here is what I found which helped me reset my battery and help me fix my Hilti battery not charging issue.
I also made a short video about this topic and you can watch it below.
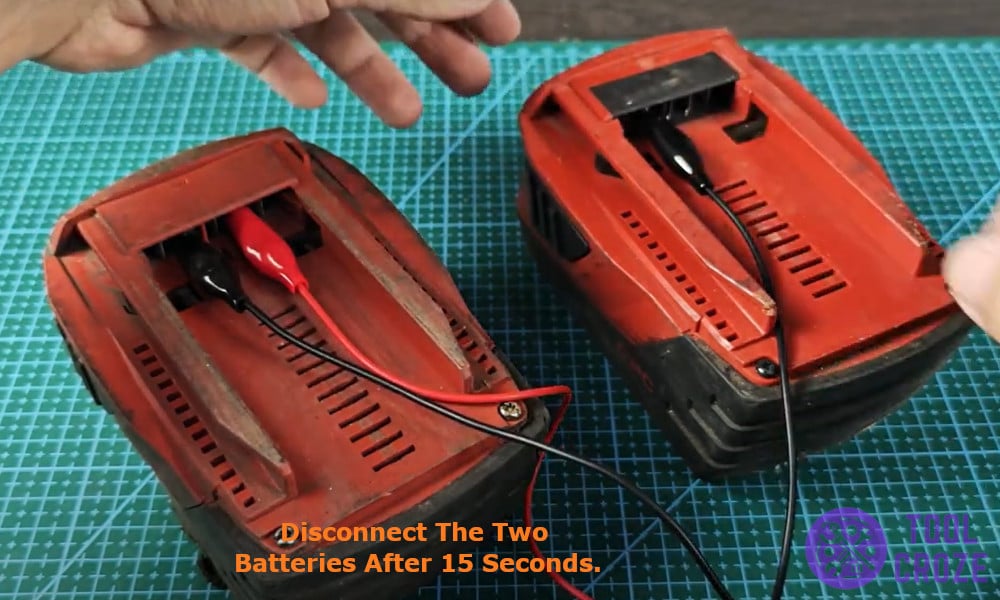
On the video, I jump started my faulty Hilti battery using another healthy Hilti battery with a similar voltage. I connected the two batteries for about 15 seconds and then I tried charging the faulty battery again.
Read: Hilti B22 Battery Pinout Wiring Diagram
How to Reset a Hilti Battery Not Charging
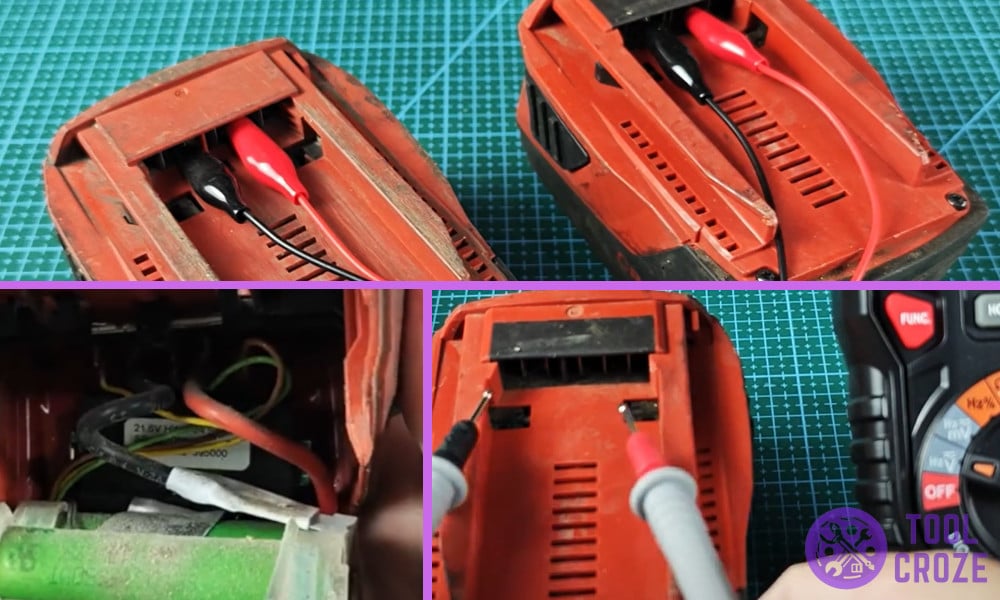
1. To fix the Hilti not charging problem we need to first identify the negative and positive terminals.
The Hilti power tool batteries don’t always come with the + and the – marking on its cover which makes it difficult to identify the terminals.
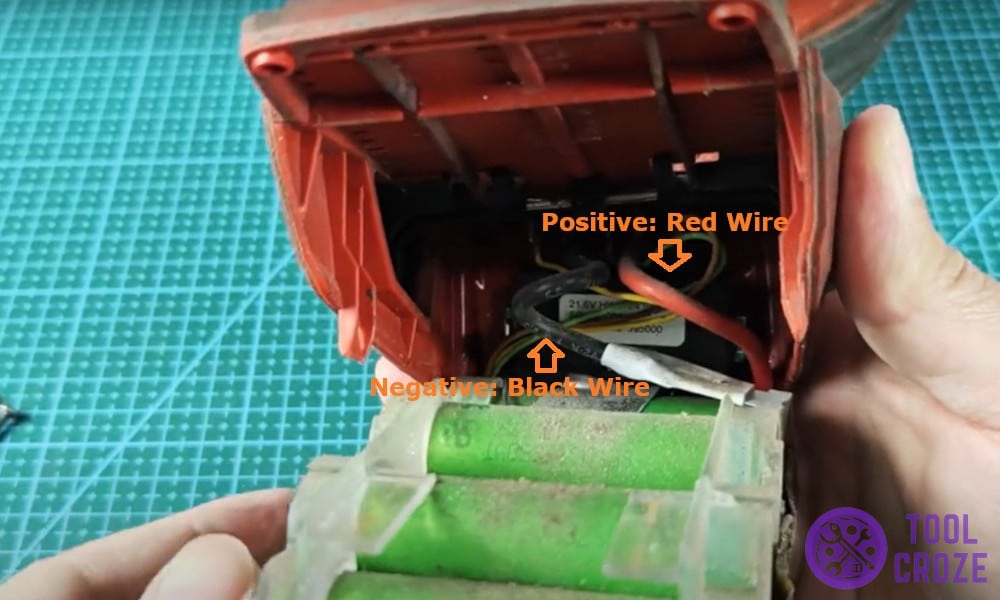
2. If you are like me and know what you are doing, you can open the battery cover and look for the wires inside, the red wire means the pin is positive and the black wire means negative.
These wires will be running from the battery to the pins of the Hilti battery.
3. If you are still unsure, you can simply use a multimeter to identify the terminals. Set the multimeter to DC voltage mode, then connect its probes on the outer terminals of the Hilti battery.
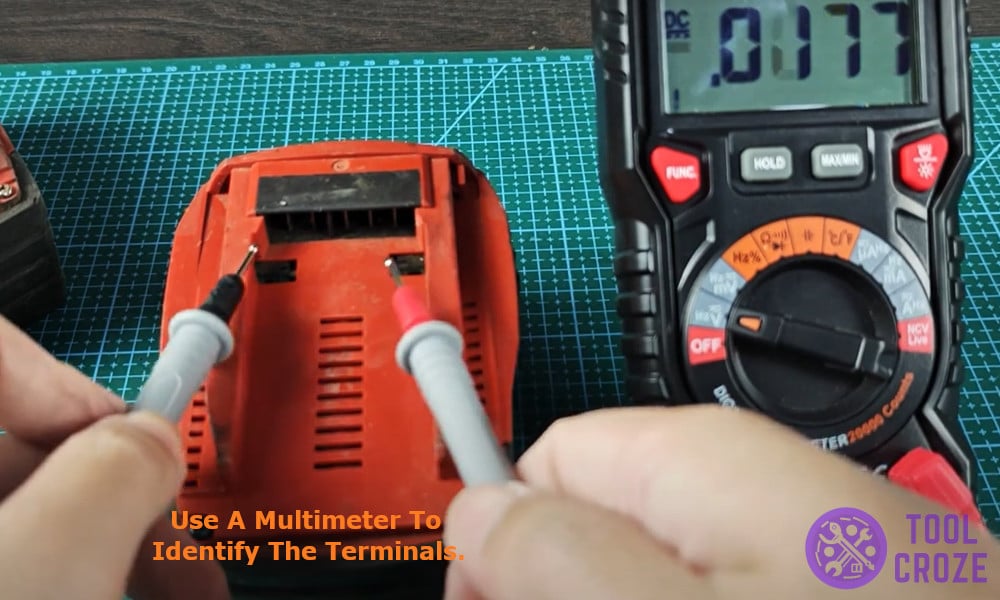
When the multimeter shows a positive reading that matches the battery voltage that means you just found your positive and negative terminals.
If the reading is negative, simply switch the places of your probes, and remember red means positive and black means negative terminal.
4. Now grab a pair of male-to-male jumper wires. Connect the positive of the healthy Hilti battery to the positive of the dead battery, and then do the same for the negative terminals.
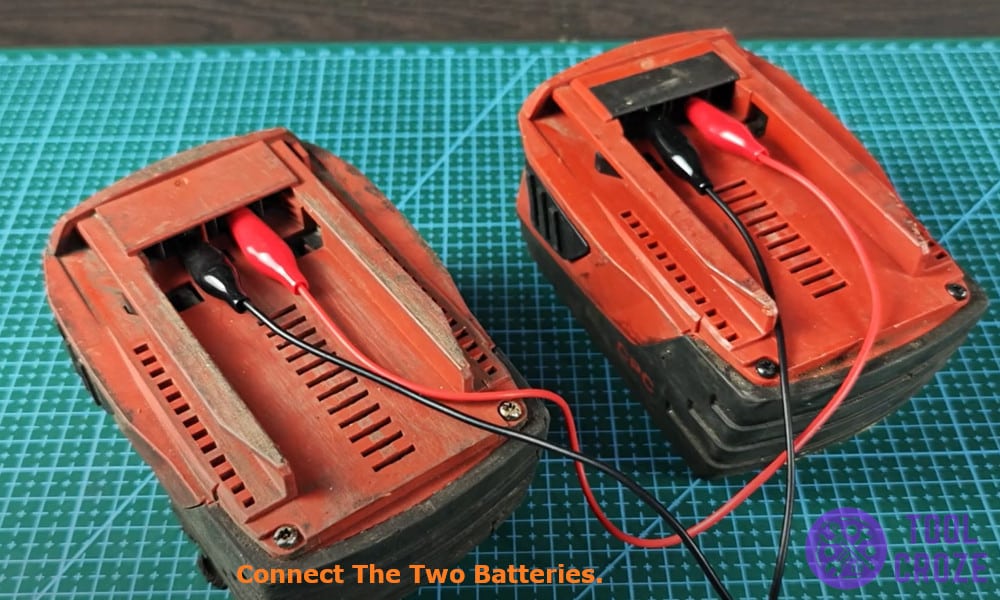
Hold the connection steady for at least 15 seconds before disconnecting both the batteries.
5. This will generate enough power in the dead Hilti battery to be recognised by the charger and get it back to charging again.
This simple trick helped me save my money and also helped me bring back my Hilti battery back to life. It started charging normally just after the restart and has never been a problem since.
You can also follow the steps above to save yourself money and a trip to your local hardware store.
And before I forget, I also have another video in which I showed the two other ways to reset a Hilti battery. You can watch it below.
You can also use a compatible 18–20V battery from another brand for resetting the faulty battery. And if you have a DC Power Supply, you can also use it to fix this issue.
